
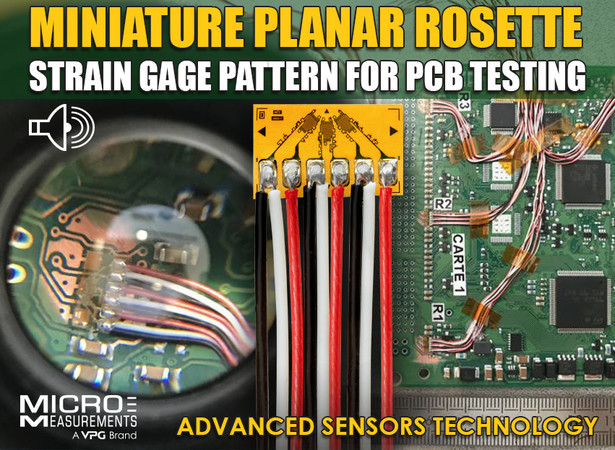
Miniature Planar Rosette Strain Gage Sensor for PCB Testing ( 6 Minutes Podcast )
Cracks in the PCBs — brittle fractures in solder and even across components, particularly around BGAs — can be induced by in-circuit test fixtures and during assembly, burn-in and testing, system integration, and packaging and shipping. Strain measurements should be made after all design iterations of the PCB, including changes to on-board components, which may alter thermal stress loading.
PCB’s remain among the most essential components of today’s automotive, aerospace, and consumer electronic products. Industry trends continue toward the adoption of RoHS compliant assembly technologies, including lead-free soldering techniques. At the same time, next-generation manufacturing processes are calling for thinner board designs and newer laminate material types. Both trends have increased PCB failure risks, due to added potential for over-flexure in the manufacturing process. With many PCB assemblers operating under customer specified strain levels, any over-flexure can lead to interconnection damage, premature field failures and product returns. As a result, manufacturers are increasing supply chain requirements for PCB mechanical stability testing.
The S5198 is RoHS compliant and is utilized in accordance with IPC–JEDEC 9702, IPC–JEDEC 9704, and JEDEC JESD22-B111 standards.
A simple tool that helps to prevent these mistakes is the checklist from Micro-Measurements.
Our new checklist is simply a standardized list of 8 required steps developed for a repetitive strain measurement task on a PCB.
Step 1: Define the Test Conditions.
Step 2: Ensure Appropriate Surface Preparation Materials Are On Hand.
Step 3: Select the Strain Sensor.
Step 4: Select the Adhesive.
Step 5: Select a Protective Coating.
Step 8: Select the Measurement Instrumentation.
Strain Gage Installation Checklist: http://www.vishaypg.com/docs/11513/pca.pdf
Strain Gage Installation Checklist: Printed Circuit Assemblies:
https://www.strainblog.com/content/strain-gage-installation-checklist-pr...
Training Programs and Schedules: http://www.vishaypg.com/micro-measurements/training-programs/
StrainTalks™ seminar: https://straintalks.com/
StrainBond™? https://strainbond.com/


Recent comments